![]() Tutorial
Tutorial

This tutorial will showcase a character creation pipeline using Reallusion’s Character Creator, 3DXchange, iClone, and ZBrush.
In this tutorial, we will be taking a close look at the iClone 3DXchange pipeline, showcasing how quick and easy creating a customized character ready for animation can be. First, we will jump into iClone Character Creator. There we will begin morphing our characters proportions and features to get the model started by simply clicking on the highlighted areas of the mesh and dragging the cursor. This will become our base mesh for the remainder of the pipeline.
Then we will import the model into 3DXchange to create a file we can bring into ZBrush to sculpt and paint on. Think of 3DXchange as our bridge program allowing us to maintain proper files for our mesh, textures, and rig for animation throughout the pipeline. In ZBrush, we will take a look at just how far a model can be pushed to create a completely new character from scratch, by sculpting and creating normal maps for high-resolution details. We will also take a look at creating custom texture maps through the use of spotlight and poly painting. All UV maps are laid out nicely and allow us to get the necessary maps we need in a very short amount of time. Once we complete our sculpting and painting we will export our mesh and texture maps, and bring them back to 3DXchange. During this step, we will be replacing the original base mesh with our newly deformed mesh, as well as plugging in our texture, normal, and specular maps. Next, we will export our mesh to iClone Character Creator where we can further our deformations and continue to adjust our proportions, and finalize the look of our custom model. We will also add hair, pants, shirt, shoes, and assets to our finalized character. And to complete the pipeline we will be sending our character to iClone to apply animations and bring our character to life.
Step 1: Base Mesh Creation
We will begin the process by opening iClone Character Creator and morphing our character by click and dragging on different areas of the mesh. In this example, I chose the Heavy Male Base Model unclothed to start with, and then deformed the mesh to make the character mesh shorter. I gave him larger hands, feet, and head, as well as deforming the chest, and neck. I also adjusted the facial features to try and get the character mesh as close to my concept as possible. Once the deformations are complete we will save the file, and export the mesh as an iAvatar with a simple click of a button.

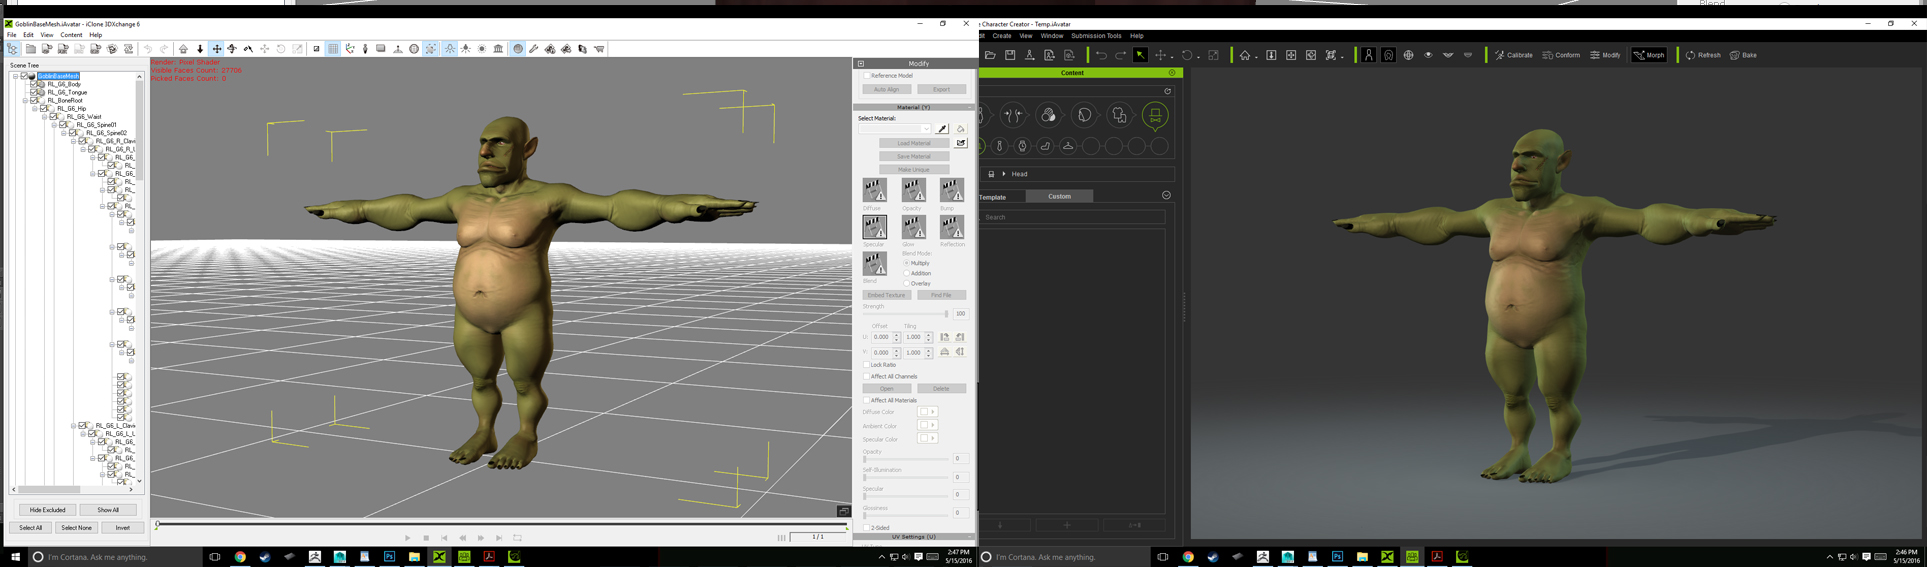
Step 2: 3DXchange and ZBrush
In this step, we will open the iAvatar file of our base mesh inside of 3DXchange. Here we will be exporting the mesh as an .OBJ file for use in ZBrush. Once the base mesh is imported to ZBrush we can begin subdividing and sculpting on our character. I subdivided the mesh 5 times, then went under the deformations tab to use the polish slider bar to smooth out the mesh even further and remove any lumps and bumps so we have a nice smooth starting point to begin with.
Drop down to subdivision level 3 and use polish, then step up to 4 and repeat, and finally, at level 5 do it once more, and you will quickly have a smooth surface base mesh.

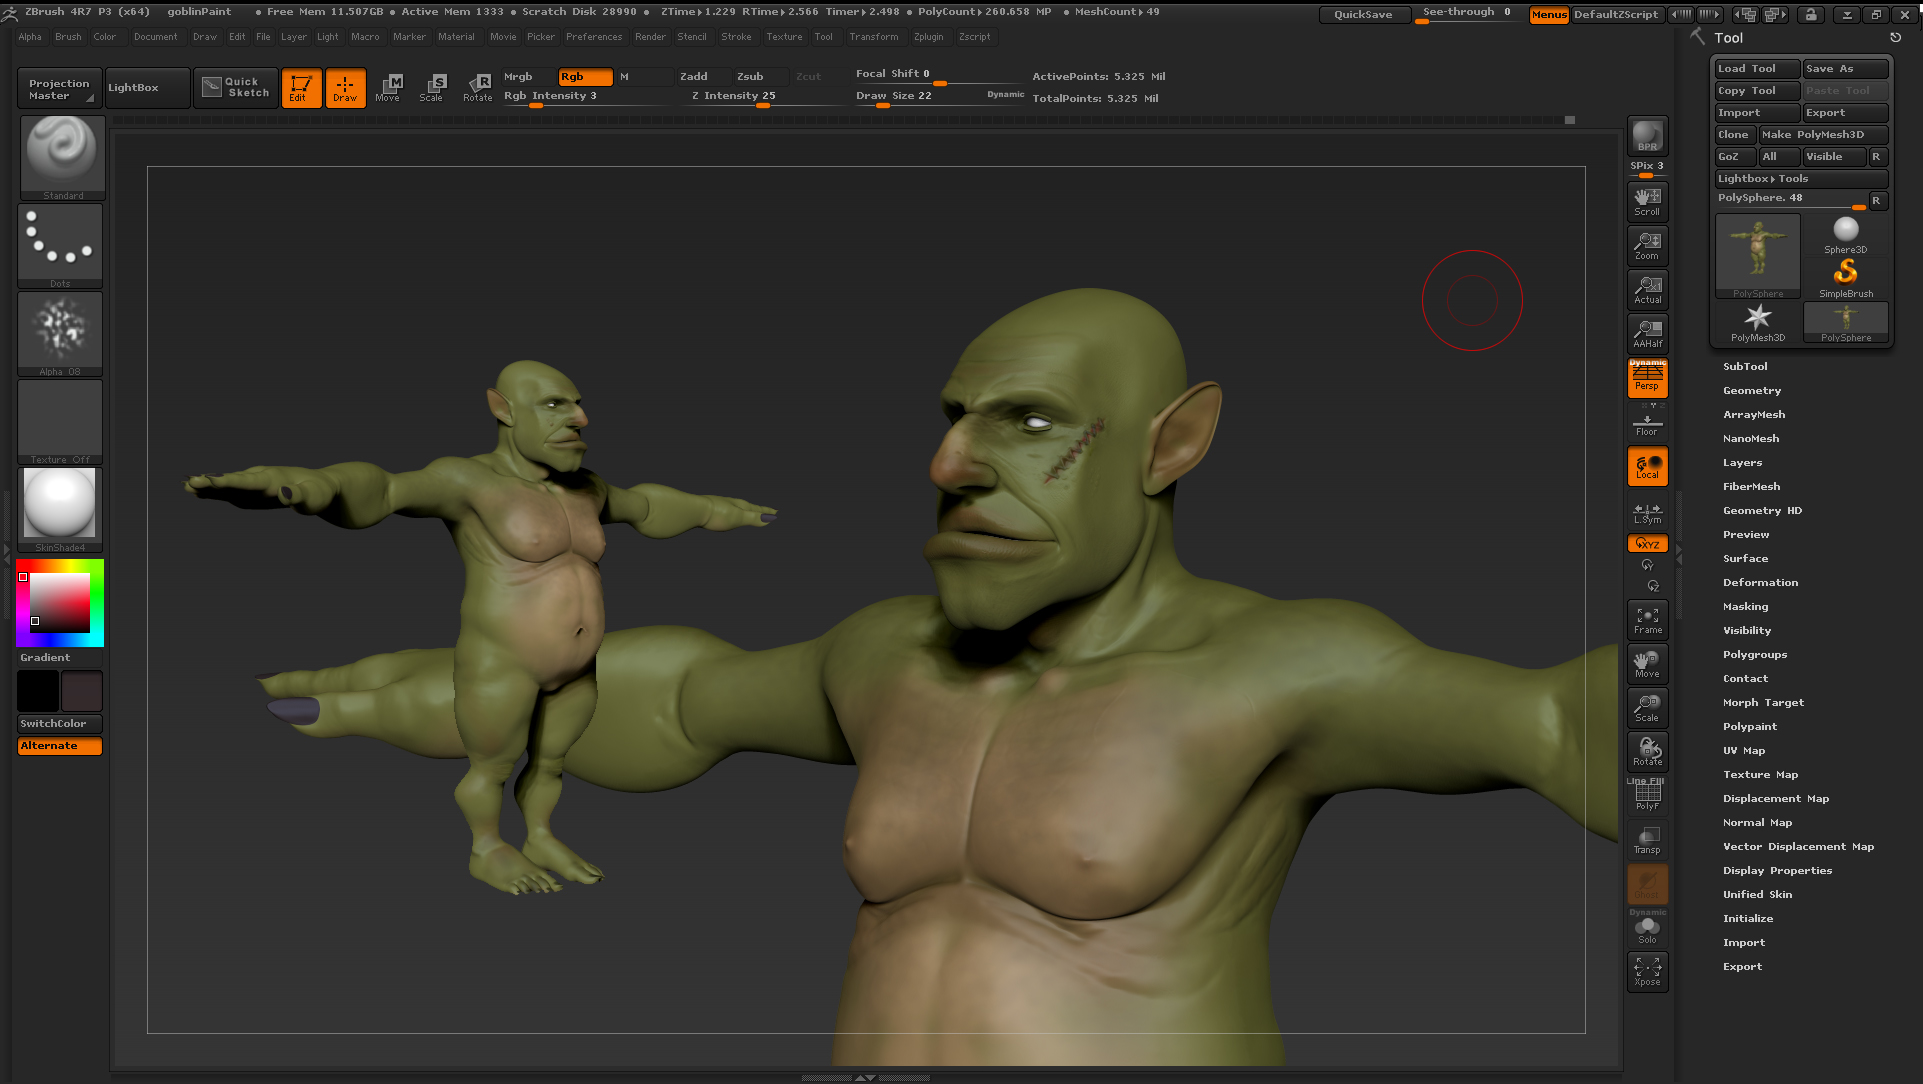
Step 3: Sculpting details
Now we are ready to push the deformations and details of our character to their limits and generate a totally new look for our character altogether. I used the move typology brush for the first round and focused mostly on the shaping of the silhouette of our mesh before adding in any major details. Generally, you want to build up gradually to higher resolution details while sculpting. Once that was complete I used the clay buildup and dam standard brushes to create wrinkles and folds in the face. I added in a scar with stitches to the cheek as if our goblin character had been in a fight to add characterization to our model. I also really wanted to see how well the details would transfer over throughout the pipeline.

Step 4: Exporting the mesh and Polypainting
In ZBrush make sure you are at the lowest subdivision level, and click the export button under the tool. Save the file as an .OBJ and return to ZBrush. Select the Skin shader material and the color of the skin, to serve as your base tone. Highlight MRGB on the top toolbar, and go to color/fill object, to apply these settings to our mesh. Now you can begin painting directly on the model. I used the Standard brush with RGB on only and began adding in highlights and shadows to the model. I also used the HPolish brush with RGB on only, which works nicely because it only paints on the peaks of your model’s details, if you use a low RGB intensity and brush very lightly while painting on the mesh. Don’t forget you can also use different masking selections to isolate out areas of high details while painting as well.
Step 5: Exporting Texture Maps
Under the tool panel, go to the poly groups tab and select “Auto Groups With UV”. This will separate the mesh into multiple poly groups based on their UV shells. Now we just need to isolate the proper groups and create our maps. Control Shift-click the head to the character mesh. This will make every other group invisible. Invert the visible groups by now and Control-Shift-click the ears, lips, mouth cavity. Invert the visibility again and go to Texture Map/Created under the Tool panel and at the highest subdivision level click “New From Polypaint”. Now click Clone New Txtr, flip it on the V axis, and export the map. At the lowest subdivision level, you will do this for your normal map creation as well. Repeat this process for each texture and normal map you have painted including the body and arms together, as well as maps for finger and toe nails.

Step 6: 3DXchange and Character Creator Finalization
In 3DXchange, open the iAvatar file we began with so that we can replace the old base mesh with our newly created one. Under the Modify tab on the right, select Face Setup from the drop-down list. Use the scroll bar under the Morph List, go to the top, and select root node Labeled “Body”. Click Replace Mesh which should now be highlighted, and import the .OBJ file we exported last from ZBrush. This step can also be done to each individual morph target by exporting to an external program like ZBrush, altering them, and replacing them back inside of 3DXchange to make corrections and adjustments. Once the mesh is replaced go to the drop-down tab again, under Modify, and this time select “Material”. Use the eyedropper to select the face, body, finger, and toenails, and replace the appropriate texture and normal maps for each area. Once everything is replaced, export the model by clicking the “iC export” icon on the Top toolbar. Open the file once more inside of iClone Character Creator and make many more adjustments to the look of the character as you would like.
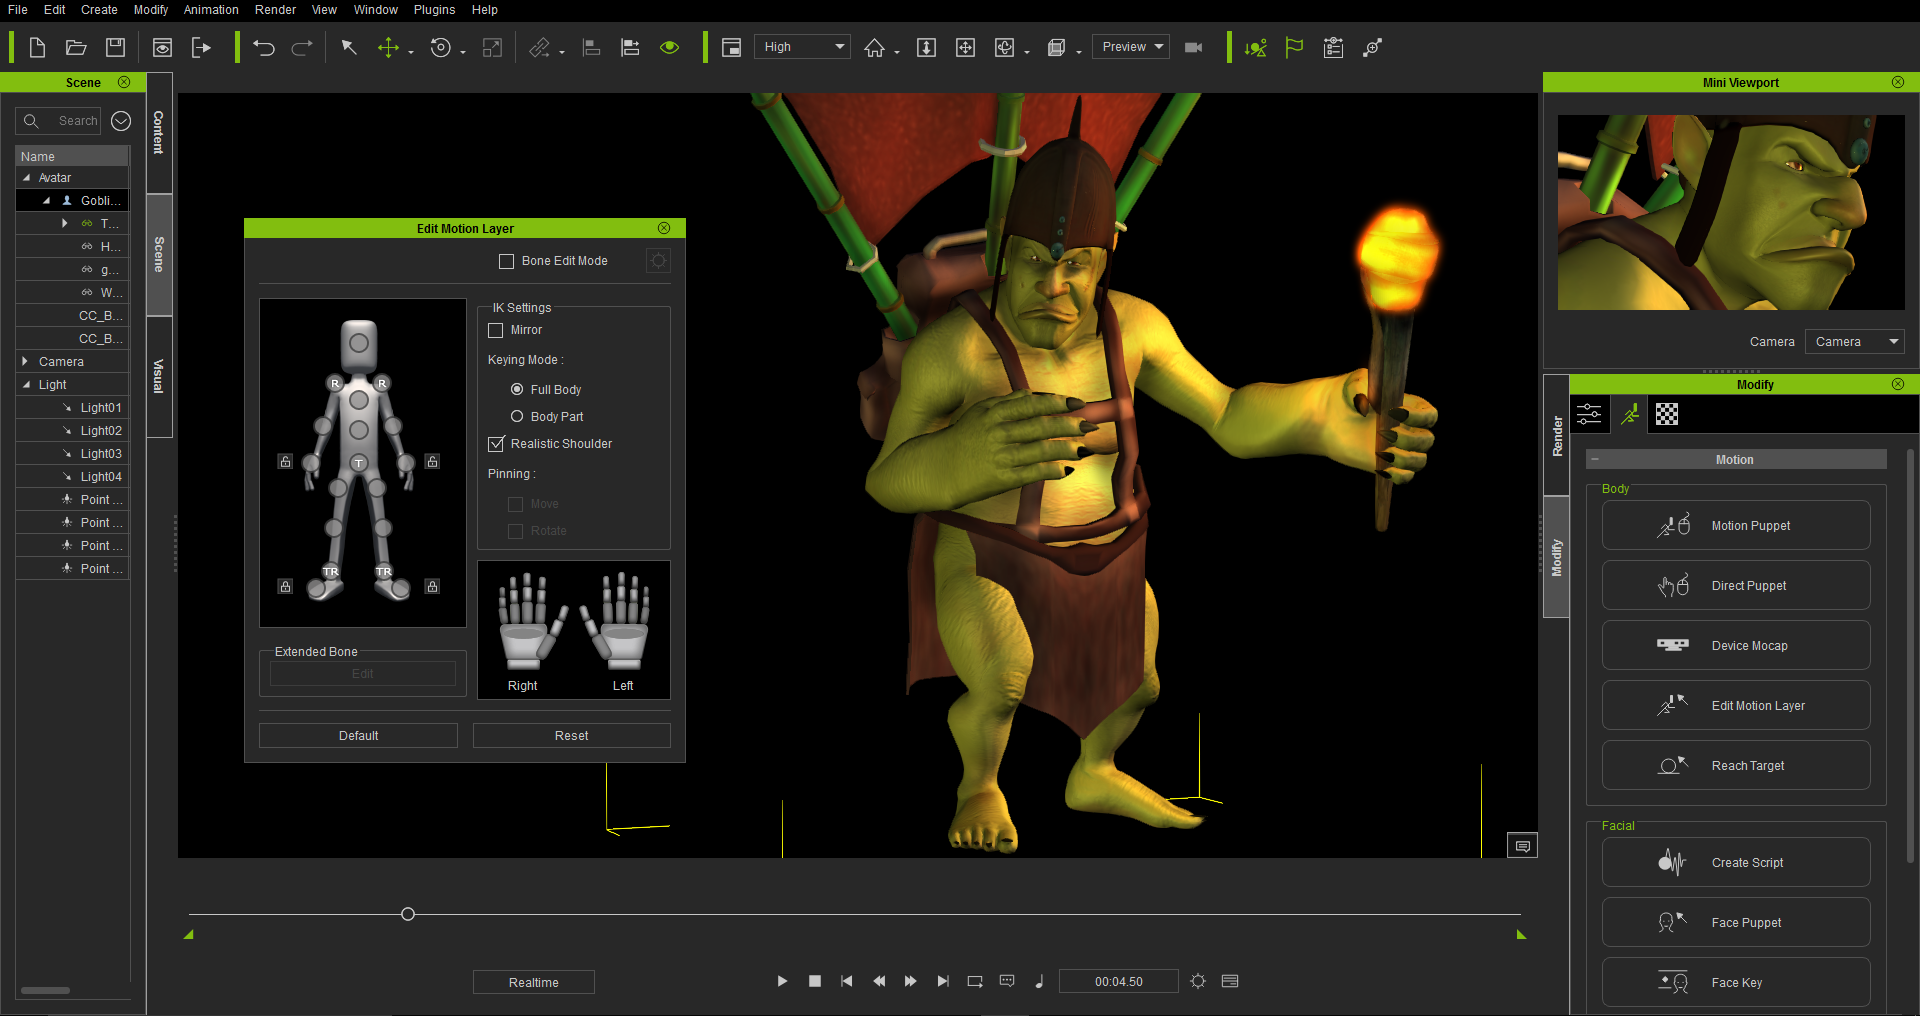
Step 7: Assets and Animation in iClone
Once you have completed finalizing the character click on the “Send Character to iClone” icon on the Top toolbar and your character will be automatically transferred. I also created custom assets which were modeled and textured from scratch to apply to the final character model.
The helmet I created was imported in 3DXchange, where I applied textures and then created custom iProps by clicking the “iC Export” icon like we did for the base mesh earlier. These iProps were then imported into iClone and placed on the character. Once they were positioned I then parented them to the respective locations. For the cloth of the helmet and waist, I created black and white weight maps and applied them back in iClone to get them simulating in real-time. Finally, I applied the character to iClone for some animation, tweaked it, and rendered out an HD movie in a matter of minutes. In conclusion, I believe this process to be the fastest way to generate and animate customized characters. I personally have never experienced a tool with so many possibilities and can’t wait to see what Reallusion does next with this amazing pipeline.
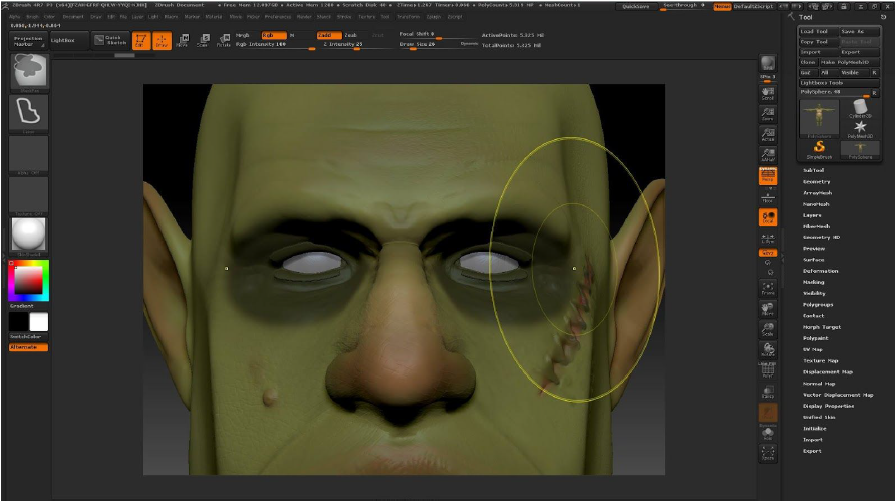
Tool Tip: HPolish Brush Painting
Using the HPolish brush with RGB on only is a great way to paint on the peaks of your high-resolution details in ZBrush. Use a very low RGB intensity and lightly brush over your model with a highlight color to create more contrast while painting.

Tool Tip: Masking
Mask out areas while sculpting to ensure areas do not deform while sculpting. To minimize morph corrections you can mask out critical areas like the eyes, so you do not have to spend too much extra time going back and forth for each morph.
Tool Tip: Dynamesh
You can duplicate your base mesh if you want to run DynaMesh on it within this pipeline. Once it is duplicated, hide the original, and run DynaMesh on the new subtool at a fairly high resolution. Once you are done sculpting, project it back onto the original base mesh.

About the Author
Michael Centkowski
Michael is the program manager at Digital Media Arts College in Boca Raton Florida & has been teaching 3D animation, modeling & game art for 10 years.


3 comments
Great tutorial so far, but for the life of me I cannot get the normal map from zBrush 4R7 to transfer over to my character in 3DXchange. I have use Auto Groups With UV, then after I have replaced the mesh from zBrush with the mesh 3DX I hide all the polygroups except for the head then create the normal map. I then clone it, flip the V in the texture pallete and then export as a png. In 3DX under the material tab I select Skin_Head, double-click the bump, then select the exported PNG file and then external texture. But the bump does not transfer. What am I doing wrong? The png file is a 2048 x 2048, I have not found a way to lower it to 1024 x 1024 in 4R7.